Calling all plushie lovers, blind box collectors, and claw machine champions! If you’ve got a growing army of keychain plushies, Pop Mart toys, or trinkets with no place to go, this DIY plushie display pillow is the project you didn’t know you needed.
This sewing tutorial will walk you through how to make a soft, functional, and super cute 16" x 16" display pillow with hanging loops and built-in pockets — perfect for showing off your favorites and keeping them from getting lost in your bed or couch cushions.
💡 What Is a Plushie Display Pillow?
Think of it like a cross between an ita bag and a cozy pillow. This beginner-friendly sewing project features:
-
A hanging strap with optional D-rings for keychains
-
Bottom pockets to hold plushies or blind box toys
-
A soft pillow insert inside
-
An envelope-style back closure (no zippers!)
It's a great way to keep your collection visible, organized, and accessible — and it’s fully customizable!
✂️ Supplies You’ll Need
This list covers everything for one 16" x 16" pillow with built-in display features:
🧵 Fabric & Materials:
-
½ yard cotton fabric for the pillow front and back
-
¼ yard contrasting cotton fabric for the bottom pocket (optional)
-
Fusible fleece interfacing – 17" x 17"
Optional: D-rings or hook clips for plushies that don't have them.
🛠 Tools:
-
Iron and ironing board
-
Sewing machine
-
Pins or quilting clips
-
Acrylic ruler and self-healing cutting mat
-
Fabric scissors or rotary cutter
-
Fabric marker or chalk
🧠 Optional: A walking foot can be helpful when sewing over multiple layers.
Shop My Favorite Supplies: Amazon Shop https://www.amazon.com/shop/diywithashley
📐 Pattern Piece Dimensions (with ½" seam allowance included)
| Piece | Cut Size (H x W) |
|---|---|
| Front Panel | 17" x 17" |
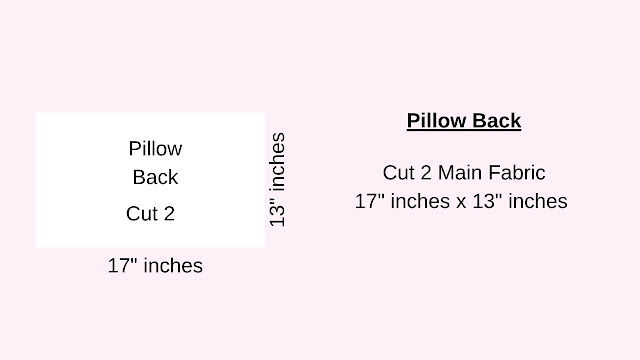
| Back Panels (x2) | 17" x 13.5" |
| Pocket Panel | 6.5" x 17" |
| Hanging Strap | 2" x 17" |
| D-Ring Loops (x6) | 2.5" x 1.5" each |
| Fusible Fleece | 17" x 17" |
🧵 Step-by-Step Instructions
Step 1: Prepare the Front Panel
-
Fuse the fusible fleece to the wrong side of your front fabric panel.
-
Set aside for now.
Step 2: Make the D-Ring Loops
-
Fold each 2.5" x 1.5" loop piece in half widthwise and press using your iron. Then fold the edges of the strip to the center and iron them as well. After everything is ironed, close up the strip and press everything shut. It should look like a piece of bias tape.
-
Topstitch 1/8" away from the edge on each of the straps.
Optional: Insert a ½" D-ring in each loop.
Step 3: Sew the Hanging Strap
-
Lay your 2" x 17" strap piece right side up.
-
Evenly space the loops across the strap, spacing them 2 3/4" away from each other, starting from the 1/2" seam allowance mark on each side.
Baste the loops to the strap.
-
Fold the (top and bottom) long edge ¼" to the wrong side of the fabric and iron flat.
Step 4: Attach the Hanging Strap
-
On your front panel, mark a line 2.5" down from the top raw edge.
-
Center and pin the strap across this line.
-
Topstitch the top and bottom of the strap, 1/8' inch from the edge, securing it flat.
Step 5: Make the Pocket Panel
-
Fold top edge over ½" twice, press, and topstitch 1/8" inch away from the edge to hem.
-
Align raw bottom edge of pocket panel with bottom edge of front panel, right sides up.
-
Pin in place.
Step 6: Divide the Pocket
-
Mark 4 equal sections (each 4" wide) across the pocket. Begin your measurement from the 1/2" seam allowance mark on each side.
-
Topstitch vertical lines from the top of the pocket to the bottom edge to form 4 pockets. Be sure to extend your stitch line past the top of the pocket and backstitch to keep the pocket secured.
Step 7: Make the Envelope Back
-
Hem one long edge of each back panel by folding over ½" twice and stitch the hem.
-
Layer the back panels right sides down on the pillow front, overlapping the hemmed edges to create an envelope-style closure.
Pin around the entire pillow.
Step 8: Assemble the Pillow
-
Sew around the entire edge with ½" seam allowance.
-
Clip corners, and finish the edges using a serger, pinking shears, or a zig-zag stitch.
Turn right side out, and press.
Step 9: Insert Pillow Form
-
Slide in your 16" x 16" pillow insert.
-
Clip on your plushie keychains to the loops.
-
Pop smaller plushies or dolls in the front pockets.
You’re done!
🧸 Customize It!
-
Make it in pastel or kawaii prints, matching your plushie aesthetic.
-
Use clips or carabiners for plushies that don’t have hooks.
-
Add labels, embroidery, or patches to personalize it.
📺 Watch the Full Tutorial
🎥 I walk you through every step of this pillow on my YouTube channel!
▶️ Watch the Plushie Display Pillow Tutorial
You can also check out these helpful beginner-friendly sewing tutorials:
❤️ Love Plushies? Save This for Later!
Pin this post or bookmark it to come back the next time you need a handmade gift idea or just want to spoil yourself (and your plushies).


No comments:
Post a Comment